- "mask_image": "",
- "image": "",
- "prompt":
Upload an image first, then paint over the area to change.
No effects available
AI Generative Fill
Replace any part of a photo with AI. Paint over the area you want to change, describe what should be there instead, and the AI fills it in so it matches the rest of the picture.
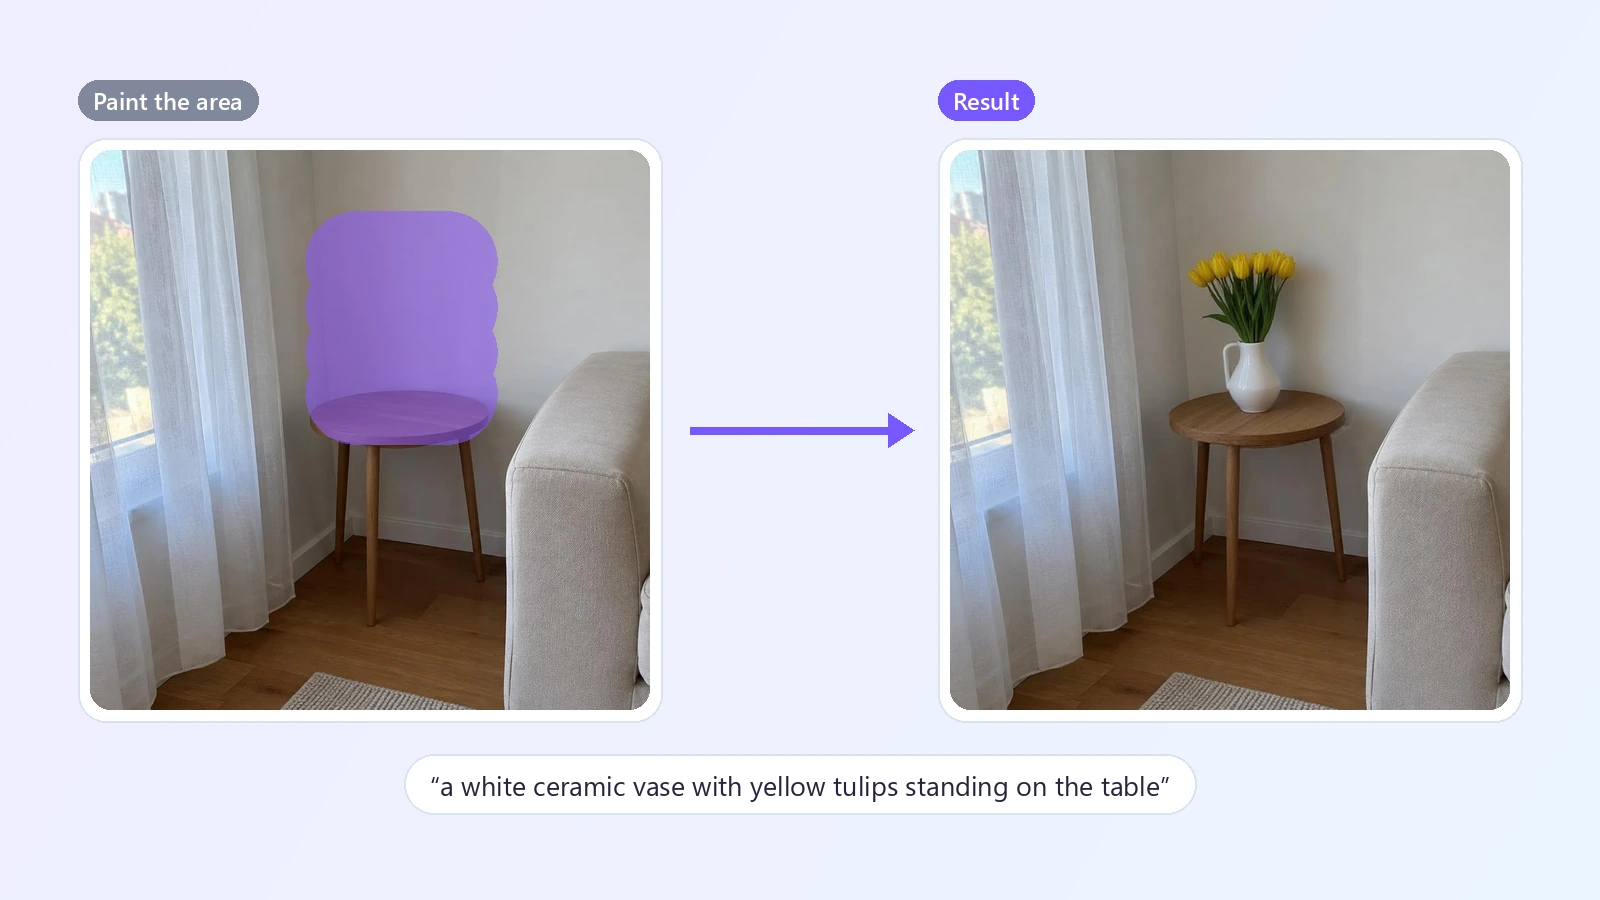
Generative fill lets you change one part of a picture and leave the rest alone. Instead of describing a whole new image, you point at the spot: you paint over an area with a brush, type what you want to see there, and the AI generates new content inside that area that follows the lighting, perspective and style around it. Paint over an empty table and ask for a vase of flowers. Paint over a plain shirt and ask for a denim jacket. Paint over a patch of sky and ask for hot-air balloons. Because you choose the area yourself, you decide exactly how much changes - a small detail or half the frame - and everything you did not paint stays as it was in your photo. This is the same idea as inpainting, made simple: no layers, no selection tools, no masks to prepare in another program. People use it to add objects to a scene, swap one thing for another, change clothing or accessories, tidy up a background by replacing clutter with something that belongs there, and try out ideas for product and interior photos before a reshoot. Short, concrete descriptions work best, and each run gives a different take, so you can generate a few versions and keep the one that fits.
At a glance
You choose the area
A brush instead of a prompt for the whole image.
Paint what should change
Brush over a detail or a large region. Adjust the brush size, undo and clear as you go.
The rest is kept
Only the painted area is regenerated. The picture around it stays the way it was.
Fills that fit the photo
New content, same scene.
Matches light and perspective
The AI reads the surroundings so the new content sits naturally in the picture.
Add, replace or restyle
Put a new object in, swap one thing for another, or change how something looks.
No editing skills
Nothing to learn.
No layers or masks to prepare
Everything happens on the page: upload, paint, type, generate.
Before and after
Compare the result with your original using the slider.
How to use generative fill
Paint, describe, generate.
Upload your image
JPG, PNG or WebP. Photos, product shots and artwork all work.
Paint the area
Brush over the part you want to change. Adjust the brush size, undo a stroke or clear and start again.
Describe and generate
Say what should appear in the painted area - a red rubber ball on the grass, a window with a sea view - and generate.
What people use it for
Adding objects
Put a plant, a lamp, a pet or a prop into a scene.
Replacing things
Swap an object for something else in the same spot.
Clothes and accessories
Change a top, add a hat, try different glasses.
Product photos
Change the surface or add props around a product.
Interiors
Try a different sofa, rug or wall art before you buy.
Backgrounds
Replace a distracting corner with something that belongs.
Frequently asked questions
What is generative fill?
How do I use AI generative fill?
Is this generative fill tool free?
Does it change the rest of my photo?
Can I remove something instead of replacing it?
Can I add something to an empty area?
How big should the painted area be?
What should I write in the description?
Can I extend the picture beyond its borders?
Does it work on phones?
Good to know
The image is resized — The result is about 1 megapixel. A larger photo comes back smaller, so the untouched part looks the same but is not pixel-identical. Use the Image Upscaler afterwards if you need more pixels.
Paint a little wider — Cover the whole thing you want to change plus a small margin. Edges that are left unpainted are kept and can show through.
Describe what you want, not what to remove — The description says what should appear. To simply erase something, use the AI Object Remover.
Each run is different — Generating again gives a new version of the fill. Try a few and keep the best.
Related tools & models
Change just the part you want
Paint an area, describe the change and let AI fill it in.